Building an AI Chatbot Interface with Vercel AI SDK and Next.js
Learn how to build a production-ready AI chatbot interface in Next.js using the Vercel AI SDK. Covers useChat, streaming responses, tool calling, structured output, multi-model routing, and frontend UX patterns for AI applications.
Introduction#
Integrating an AI language model into a web application is no longer a niche capability reserved for specialized teams. In 2026, it is a standard part of the modern frontend engineer’s toolkit. Users expect intelligent interfaces like chat assistants, smart search, contextual suggestions, and dynamic content generation as baseline features rather than novelties.
The challenge for frontend engineers has never been accessing a powerful language model. It has always been everything around it: handling streaming responses, managing conversation state, rendering tool call results, dealing with errors gracefully, and shipping a user experience that feels fast and reliable. The Vercel AI SDK was built to solve exactly these problems.
At 67.5 kB gzipped, it is purpose-built for edge runtime environments and React Server Components, making it the most practical choice for Next.js applications. This guide walks through building a complete, production-ready AI chatbot interface from the ground up, covering streaming, tool calling, structured output, multi-model routing, and the UX patterns that separate a polished AI feature from a rough prototype.
Project Setup#
Start by scaffolding a new Next.js 15 project with the App Router, then install the required dependencies.
npx create-next-app@latest ai-chat-app --typescript --tailwind --eslint --app --src-dir
cd ai-chat-app

# Install Vercel AI SDK and provider packages
npm install ai @ai-sdk/openai @ai-sdk/anthropic zod
Create a .env.local file at the project root and add your API key.
OPENAI_API_KEY=your_openai_api_key_hereThe Core Architecture#
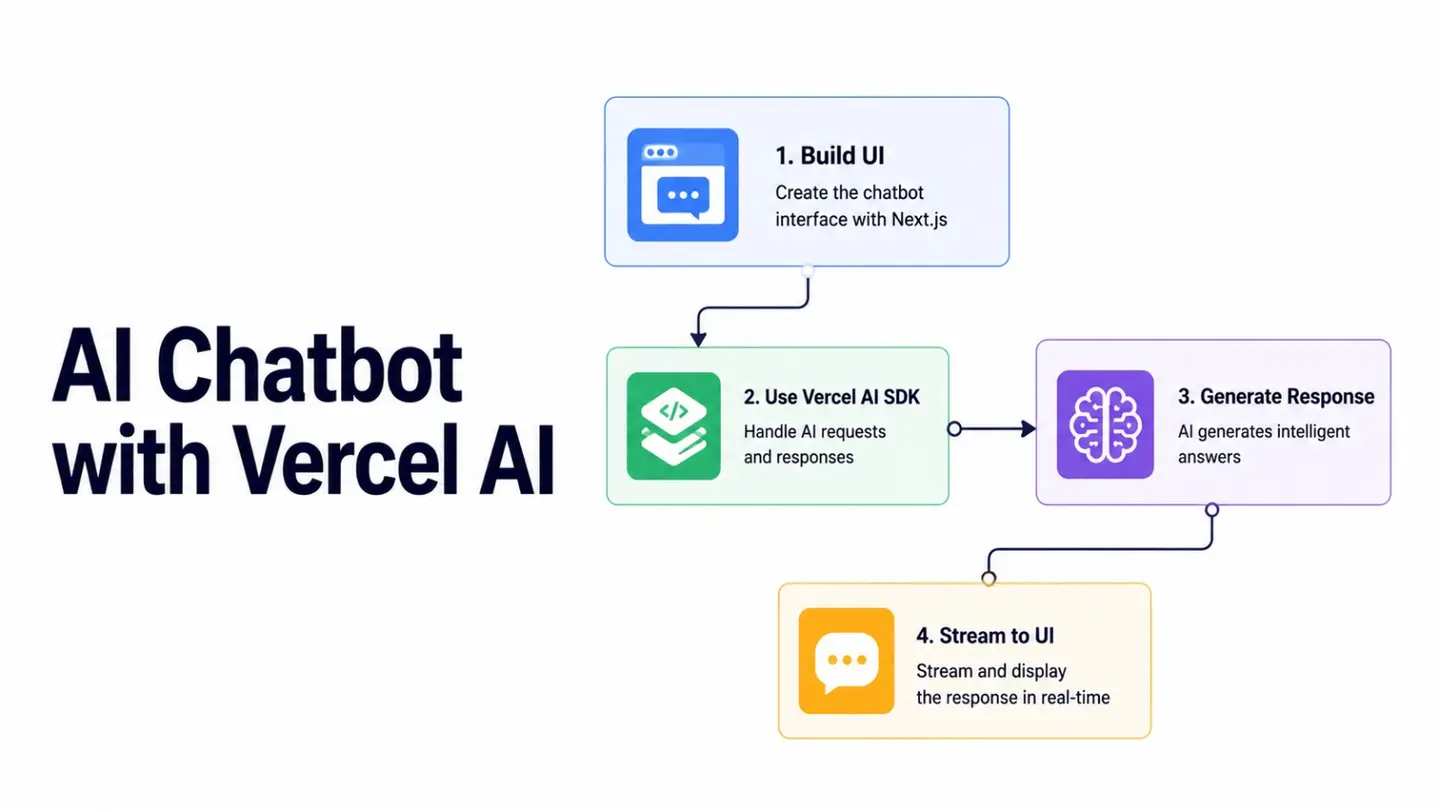
A Vercel AI SDK chatbot has two main parts that work together. The backend is a Next.js Route Handler that calls streamText and returns a streaming response. The frontend is a React component that uses the useChat hook to manage conversation state and render messages as they arrive.
This separation keeps AI logic on the server where API keys stay secure and heavy processing does not bloat the client bundle, while the frontend handles only what it must: rendering the streaming output and capturing user input.
Building the API Route#
Create the Route Handler at app/api/chat/route.ts. This is the server-side entry point for all chat requests.
// app/api/chat/route.ts
import { streamText } from 'ai';
import { openai } from '@ai-sdk/openai';

export const runtime = 'edge';

export async function POST(request: Request) {
  const { messages } = await request.json();

  const result = streamText({
    model: openai('gpt-4o'),
    system: `You are a helpful assistant for a software development platform.
             Be concise, technically accurate, and use code examples where appropriate.
             Always respond in well-structured markdown.`,
    messages,
    maxTokens: 1500,
  });

  return result.toDataStreamResponse();
}
Setting runtime = 'edge' deploys this route to Vercel’s edge network, which reduces latency significantly by running the handler closer to your users. The streamText function handles the entire streaming pipeline, calling the model, receiving tokens incrementally, and piping them back to the client via the Data Stream Protocol that useChat understands natively.
Building the Chat Interface#
Create the client component that renders the conversation and handles user input.
'use client';

import { useChat } from 'ai/react';
import { useRef, useEffect } from 'react';

export function ChatInterface() {
  const bottomRef = useRef<HTMLDivElement>(null);

  const {
    messages,
    input,
    handleInputChange,
    handleSubmit,
    isLoading,
    error,
    reload,
  } = useChat({
    api: '/api/chat',
    onError: (error) => {
      console.error('Chat error:', error);
    },
  });

  useEffect(() => {
    bottomRef.current?.scrollIntoView({ behavior: 'smooth' });
  }, [messages]);

  return (
    <div className="flex flex-col h-screen max-w-3xl mx-auto">
      {/* Message List */}
      <div className="flex-1 overflow-y-auto p-6 space-y-4">
        {messages.length === 0 && (
          <div className="text-center text-gray-400 mt-20">
            <p className="text-lg font-medium">How can I help you today?</p>
          </div>
        )}

        {messages.map((message) => (
          <div
            key={message.id}
            className={`flex ${message.role === 'user' ? 'justify-end' : 'justify-start'}`}
          >
            <div
              className={`max-w-prose px-4 py-3 rounded-2xl text-sm leading-relaxed ${
                message.role === 'user'
                  ? 'bg-blue-600 text-white rounded-br-sm'
                  : 'bg-gray-100 text-gray-900 rounded-bl-sm'
              }`}
            >
              {message.content}
            </div>
          </div>
        ))}

        {isLoading && (
          <div className="flex justify-start">
            <div className="bg-gray-100 px-4 py-3 rounded-2xl rounded-bl-sm">
              <span className="flex gap-1">
                <span className="w-2 h-2 bg-gray-400 rounded-full animate-bounce [animation-delay:0ms]" />
                <span className="w-2 h-2 bg-gray-400 rounded-full animate-bounce [animation-delay:150ms]" />
                <span className="w-2 h-2 bg-gray-400 rounded-full animate-bounce [animation-delay:300ms]" />
              </span>
            </div>
          </div>
        )}

        {error && (
          <div className="flex justify-center">
            <div className="bg-red-50 text-red-600 px-4 py-2 rounded-lg text-sm flex items-center gap-2">
              <span>Something went wrong.</span>
              <button onClick={reload} className="underline">Retry</button>
            </div>
          </div>
        )}

        <div ref={bottomRef} />
      </div>

      {/* Input Area */}
      <div className="border-t bg-white p-4">
        <form onSubmit={handleSubmit} className="flex gap-3">
          <input
            value={input}
            onChange={handleInputChange}
            placeholder="Ask anything..."
            disabled={isLoading}
            className="flex-1 px-4 py-2.5 border border-gray-200 rounded-xl text-sm
                       focus:outline-none focus:ring-2 focus:ring-blue-500 disabled:opacity-50"
          />
          <button
            type="submit"
            disabled={isLoading || !input.trim()}
            className="px-5 py-2.5 bg-blue-600 text-white rounded-xl text-sm font-medium
                       hover:bg-blue-700 disabled:opacity-50 disabled:cursor-not-allowed transition-colors"
          >
            Send
          </button>
        </form>
      </div>
    </div>
  );
}
The useChat hook manages the full conversation lifecycle automatically. It sends the complete message history to the API route on each submission, appends the streaming assistant response to the local state as tokens arrive, and exposes loading and error states that drive the UI. The animated typing indicator and inline retry button are small details that significantly improve the perceived quality of the experience.
Adding Tool Calling#
Tool calling is one of the most powerful capabilities in the Vercel AI SDK. It allows the model to invoke structured functions such as fetching data, running calculations, and querying APIs, then have the results rendered as rich UI components rather than plain text.
Define tools on the server and render their results on the client.
// app/api/chat/route.ts: with tool calling
import { streamText, tool } from 'ai';
import { openai } from '@ai-sdk/openai';
import { z } from 'zod';

export const runtime = 'edge';

export async function POST(request: Request) {
  const { messages } = await request.json();

  const result = streamText({
    model: openai('gpt-4o'),
    system: 'You are a helpful assistant. Use the available tools when relevant.',
    messages,
    tools: {
      getWeather: tool({
        description: 'Get the current weather for a given city',
        parameters: z.object({
          city: z.string().describe('The name of the city'),
          unit: z.enum(['celsius', 'fahrenheit']).default('celsius'),
        }),
        execute: async ({ city, unit }) => {
          // Replace with a real weather API call
          return {
            city,
            temperature: unit === 'celsius' ? 22 : 72,
            condition: 'Partly cloudy',
            humidity: 58,
          };
        },
      }),
    },
    maxSteps: 3,
  });

  return result.toDataStreamResponse();
}
// components/WeatherCard.tsx
type WeatherData = {
city: string;
temperature: number;
condition: string;
humidity: number;
};
export function WeatherCard({ data }: { data: WeatherData }) {
return (
<div className="bg-gradient-to-br from-blue-50 to-blue-100 rounded-xl p-4 max-w-sm">
<h3 className="font-semibold text-blue-900">{data.city}</h3>
<p className="text-3xl font-bold text-blue-700 mt-1">{data.temperature}°</p>
<p className="text-blue-600 text-sm">{data.condition}</p>
<p className="text-blue-500 text-xs mt-1">Humidity: {data.humidity}%</p>
</div>
);
}// In the ChatInterface component: render tool results
{messages.map((message) => (
<div key={message.id}>
{message.content && (
<div>{message.content}</div>
)}
{message.toolInvocations?.map((tool) => (
<div key={tool.toolCallId}>
{tool.toolName === 'getWeather' && tool.state === 'result' && (
<WeatherCard data={tool.result} />
)}
{tool.state === 'call' && (
<div className="text-sm text-gray-400 animate-pulse">
Fetching weather data...
</div>
)}
</div>
))}
</div>
))}The maxSteps: 3 parameter allows the model to chain up to three tool calls in a single conversation turn, which is useful when a task requires multiple sequential lookups before generating a final response.
Multi-Model Routing#
Different tasks benefit from different models. A quick factual question does not need the same model as a complex code review. Routing requests to the right model based on context reduces cost and improves response quality.
// app/api/chat/route.ts: with model routing
import { streamText } from 'ai';
import { openai } from '@ai-sdk/openai';
import { anthropic } from '@ai-sdk/anthropic';

function selectModel(messages: { role: string; content: string }[]) {
  const lastMessage = messages[messages.length - 1]?.content ?? '';
  const isCodeTask = /\b(code|debug|refactor|function|component|fix|implement)\b/i.test(lastMessage);

  // Route code-related tasks to Claude, general tasks to GPT-4o Mini
  return isCodeTask
    ? anthropic('claude-sonnet-4-6')
    : openai('gpt-4o-mini');
}

export async function POST(request: Request) {
  const { messages } = await request.json();
  const model = selectModel(messages);

  const result = streamText({
    model,
    system: 'You are a helpful development assistant.',
    messages,
  });

  return result.toDataStreamResponse();
}
Persisting Chat History#
By default, useChat stores conversation state in memory. When the user refreshes the page, the history is lost. For a production application, you need to persist messages to a database and restore them on load.
'use client';

import { useChat } from 'ai/react';
import { useEffect } from 'react';

type SavedMessage = { id: string; role: 'user' | 'assistant'; content: string };

export function PersistentChat({ sessionId, initialMessages }: {
  sessionId: string;
  initialMessages: SavedMessage[];
}) {
  const { messages, input, handleInputChange, handleSubmit, isLoading } = useChat({
    api: '/api/chat',
    initialMessages,
    onFinish: async (message) => {
      // Save the completed assistant message to your database
      await fetch('/api/messages', {
        method: 'POST',
        headers: { 'Content-Type': 'application/json' },
        body: JSON.stringify({ sessionId, message }),
      });
    },
  });

  return (
    <div>
      {/* Render messages and input */}
    </div>
  );
}
Pass initialMessages fetched from your database via a Server Component, and use the onFinish callback to persist each completed assistant message. User messages can be saved optimistically in the onSubmit handler before the API call resolves.
UX Patterns That Matter#
The technical implementation is only half the work. The quality of an AI chatbot interface is largely determined by a set of UX decisions that are easy to overlook.
Auto-scroll to the Latest Message#
Attach a ref to an empty div at the bottom of the message list and call scrollIntoView whenever messages change. Users should never have to manually scroll to see the model’s response as it streams in.
Disable Input During Generation#
Disable the input field and submit button while isLoading is true. Allowing the user to submit another message mid-stream leads to confusing state and broken conversation context.
Inline Error Recovery#
Expose the reload function from useChat as a visible retry button when an error occurs. Never leave users staring at a silent failure with no path forward.
Typing Indicators#
Show an animated indicator immediately when a request is in flight. Even if the first token arrives quickly, the half-second gap between submission and first output feels long without visual feedback.
Empty State#
Render a helpful prompt or suggested questions when the conversation history is empty. A blank white screen with only an input box provides no guidance on what the assistant can actually help with.
Conclusion#
The Vercel AI SDK removes the most painful plumbing from AI frontend development, including streaming protocol handling, conversation state synchronization, tool result rendering, and multi-provider routing, and replaces it with a clean, composable API that integrates naturally with the Next.js App Router.
The patterns in this guide, covering a streaming edge Route Handler, a useChat-powered interface, tool calling with rich component rendering, model routing, and persistent history, represent the complete foundation for any production AI chat feature. Each layer is independently testable and progressively replaceable as your application’s requirements evolve.
Building the interface is the part of AI development that frontend engineers own entirely. Getting it right, fast, reliable, and genuinely delightful to use, is what separates products users return to from demos they try once and forget.
References#
Vercel AI SDK Official Documentation (ai-sdk.dev)
Getting Started: Next.js App Router with AI SDK (ai-sdk.dev)
Build an AI Chatbot with Vercel AI SDK (tech-insider.org)
Vercel AI SDK Complete Guide: Production AI Chat Apps (dev.to)
Last updated